Astronomy: Light Pollution, Crude fix to save the night

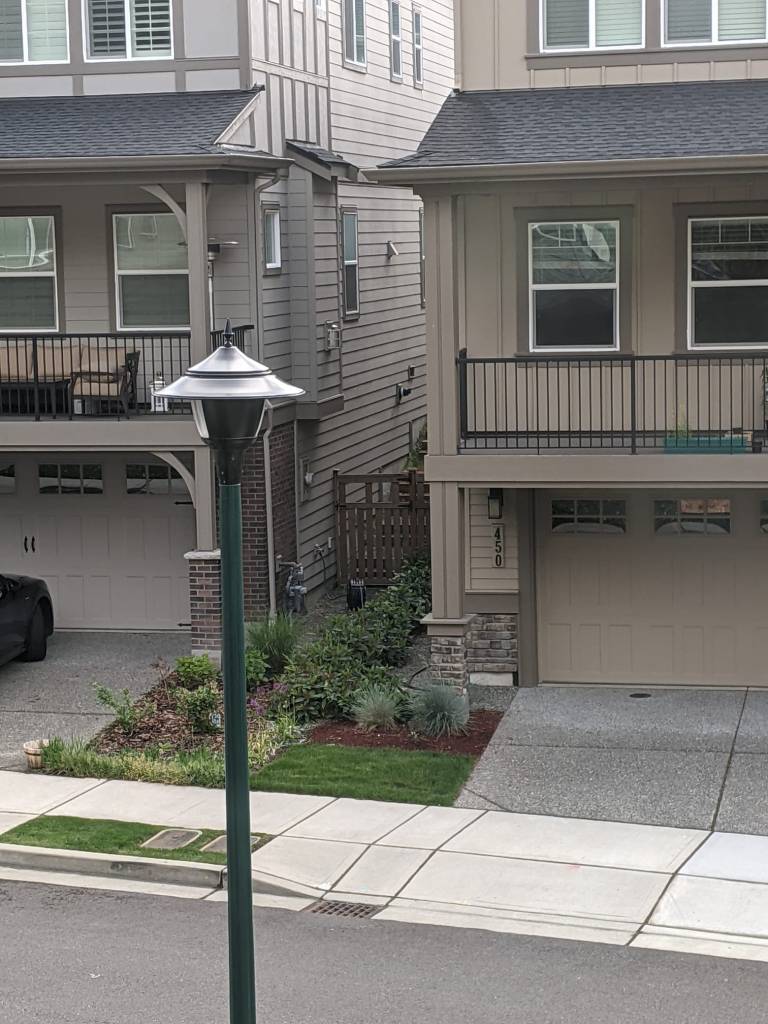
I’m not sure if I have shared this before but I currently take pictures from my drive way. Apart from the limited FOV, only the south eastern, north eastern are visible making it a bit challenging to get images for objects more than a couple of hours a night. On top of that, there is a bright street light right next to my drive way 😐 . The light also shines right into one of the guest bedroom. To mitigate the problem, I contacted the light company and explained the situation. The were kind enough to put up a shield on one side of the light. While helpful, it is not completely opaque allowing enough light to pass through so as to be a problem.

Light pollution source on my driveway

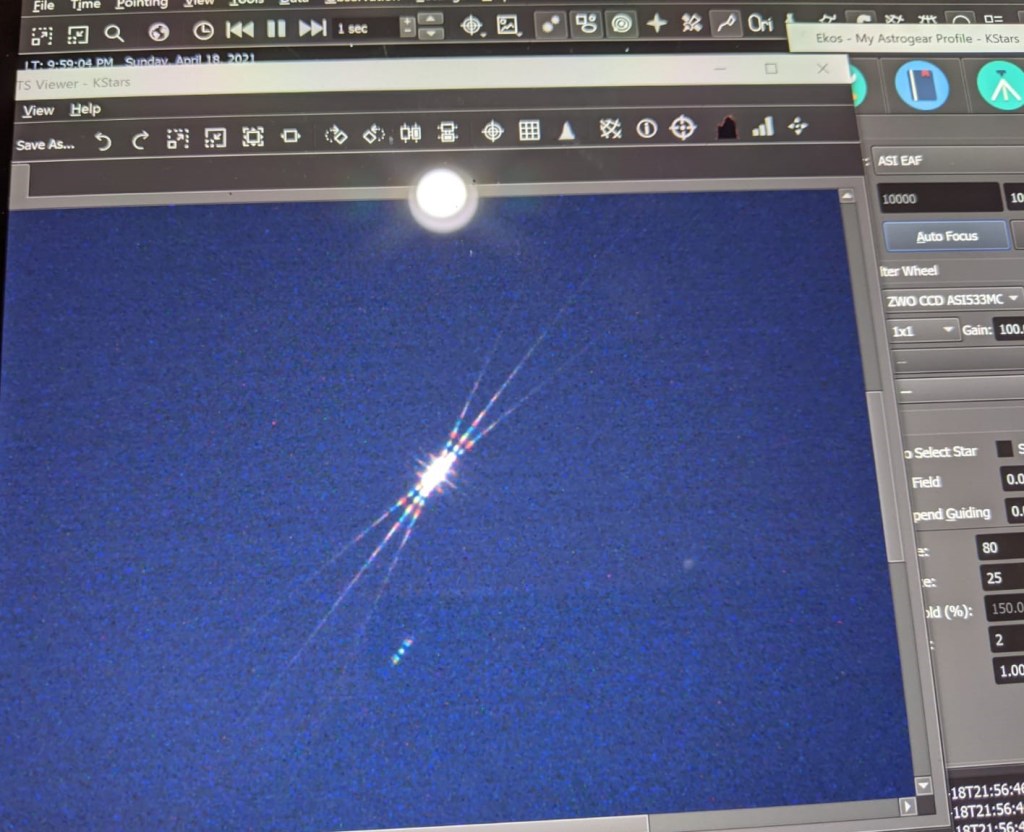
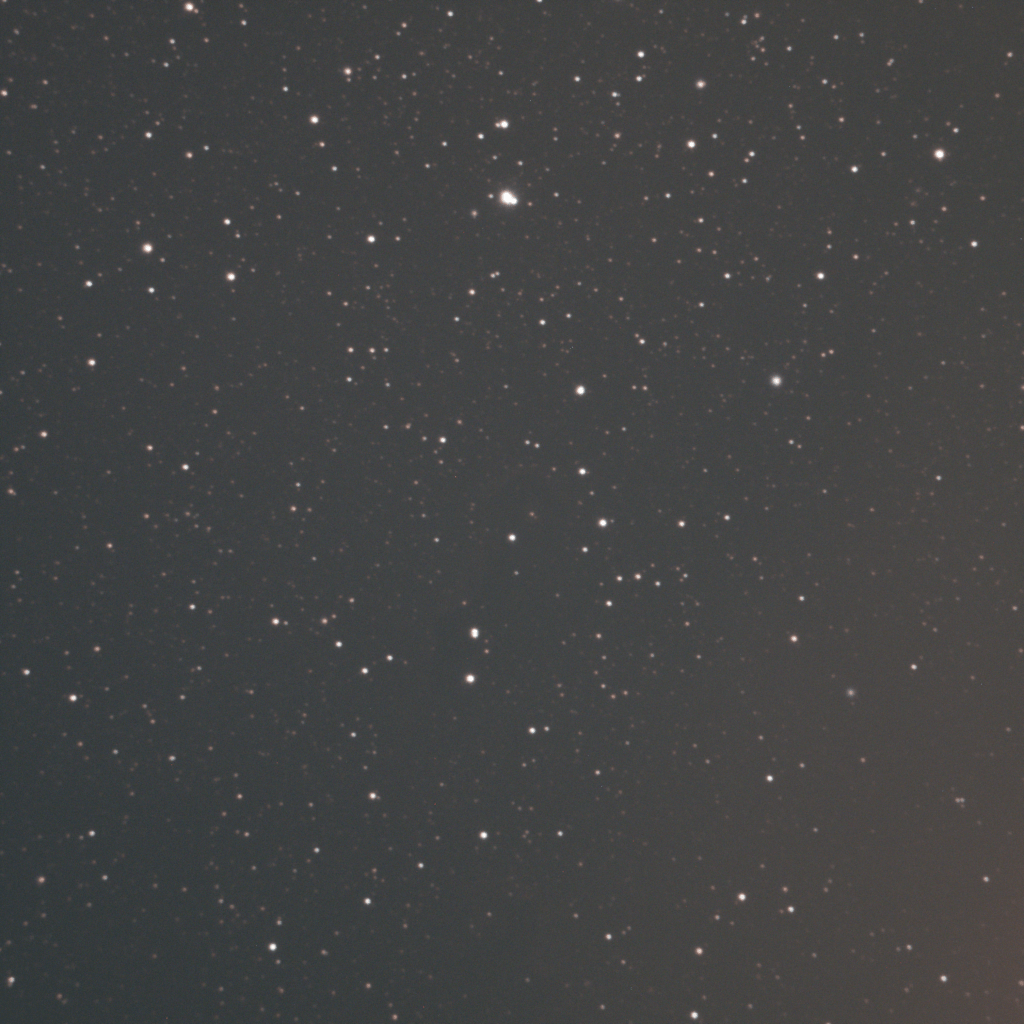
This is usually not a huge challenge when I take pictures of objects in the south eastern skies. However, at this time of the year not many targets are visible in that region of the sky during the early part of the night. So I had to resort to targeting objects in the north/northeastern skies. The lamp created so terrible LP artifacts that the subs were unusable. I had a cheap light pollution filter applied but it wasn’t any use either. Here are a couple of sample pictures I tried to take. The first one is a 5 minute sub of Elephant’s trunk nebula (not sure if you can make out the faint outline at the center of the image) and the second is 3 minute sub of Iris Nebula. As you can see, both the images have the light pollution artifact ruining the right side of the image. The more subs I stack the more apparent the problem becomes. Going back to my point about PNW not getting enough clear sky nights, I did not want the night to be ruined. Especially, as I was able to achieve pretty good focus and guiding.

Elephant Trunk Nebula 300 second Image
Iris Nebula 180 second image

So, I resorted to a very crude but effective way to get rid of light pollution (within limits) as long as the object was not in close proximity of the street light. My solution was to quickly put up a flattened cardboard box at the end of the OTA using an elastic band. Here is what the set up looked like 🙂

Amy’s Thai Red Curry to the rescue!

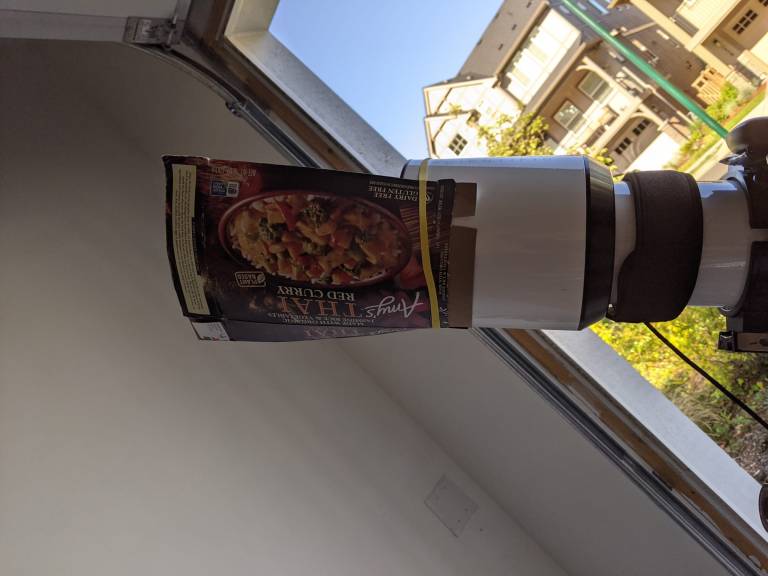
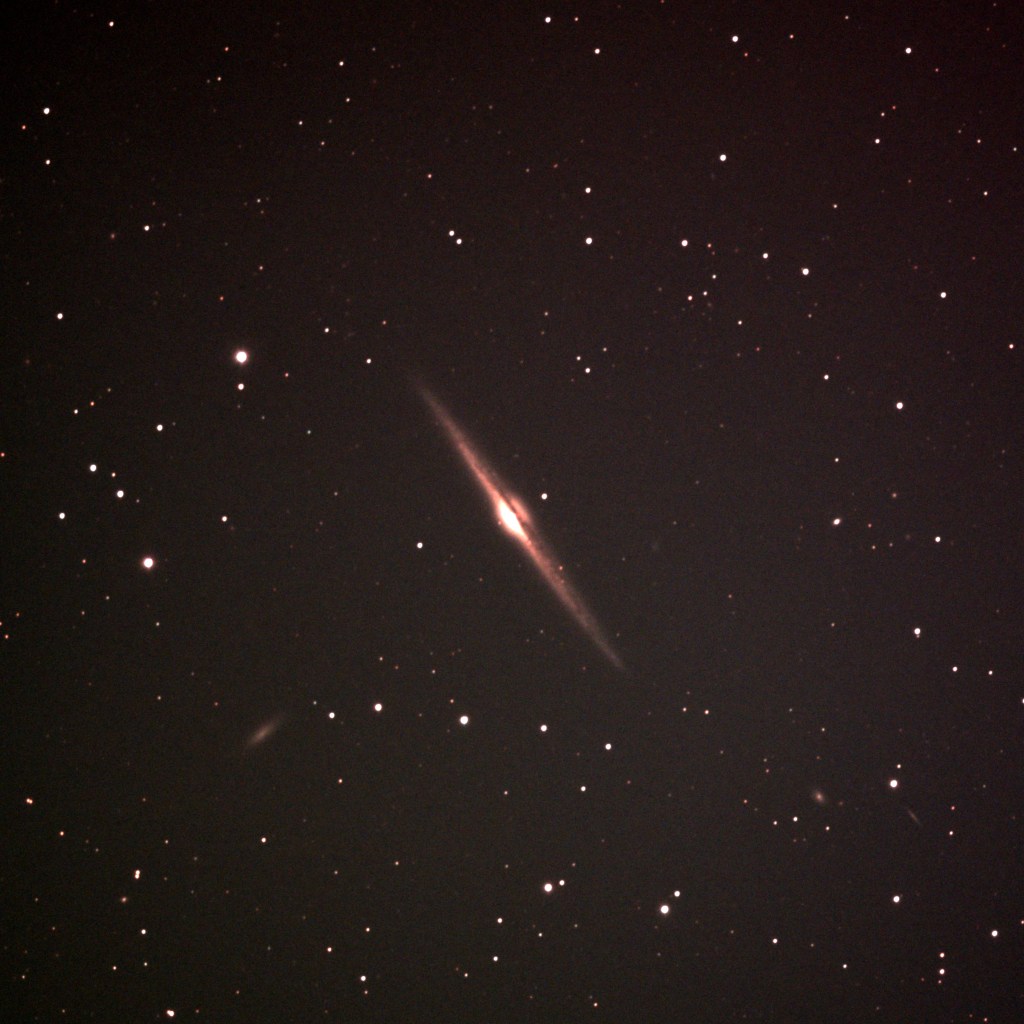
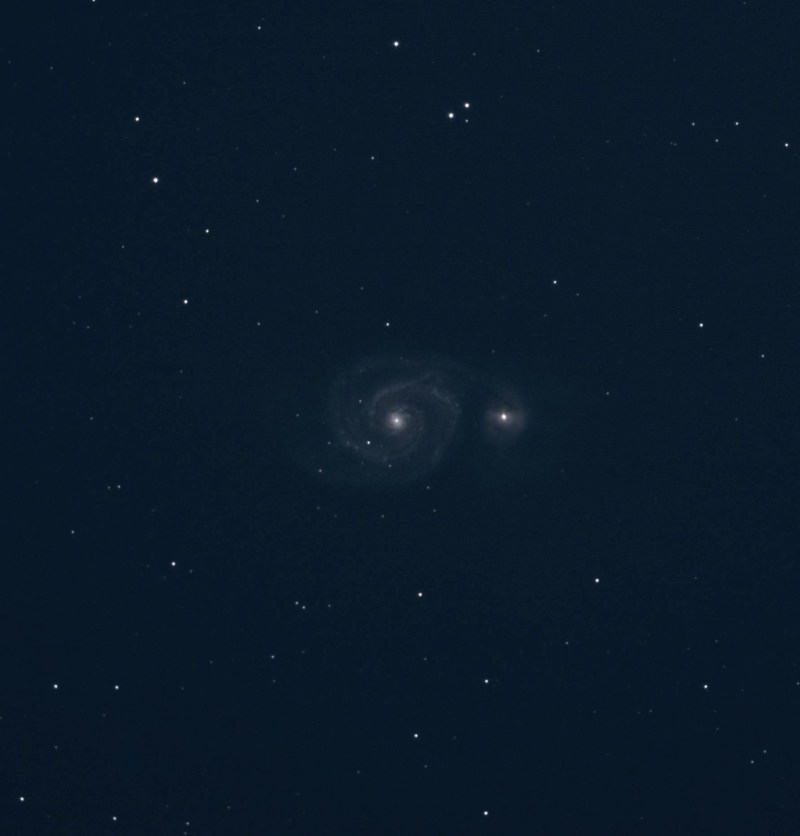
The crude and quick fix saved the night. I don’t care how it looks! It worked!! You can see the results for yourself to judge. However, I think I need to improve on my light pollution filter and create a v2 that is a bit more “sophisticated” 🙂 (black chart paper which encircles the entire OTA). Will keep you posted on how that goes

Iris Nebula Light Pollution mitigated

Astronomy: Can’t get to focus

I’m not talking about me here. Although, the title of the post can apply to my work life and personal life in light of covid-fatigue, this post is about focus on my telescope. My setup is mostly automated once the telescope is placed in position and polar aligned. I know, in one of my posts I mentioned vlogging about my setup for any new astronomers out there. I just have been too lazy to do it #COVIDfatigue. I’ll get to it at some point but not sure if it is worth anything for the 2 subscribers that I have 🙂 . So, where was I, oh yes, focus on my telescope. My setup is mostly automated and I used EKOS and Kstars for imaging. The software also has focusing algorithms if you have a motorised focuser. I have so far struggled with getting pinpoint star focus using the algorithms. In fact, I have wasted a couple of wonderful nights because the pictures were not quite in focus and the stacking software did not reconize the stars. Here is an example image from last night which was a lost cause. I was trying to capture a portion of the Markarian’s chain – a popular target for the galaxy season.

Failed attempt at a part of Markarian’s Chain – Each fuzzy object is a galaxy!

One of the challenges imaging from my driveway, is the limited time window objects are visible for. The field of view is limited with my house obstructing all of western part of the sky and the houses across from my house cover a substantial portion of the sky on the eastern side. The only saving grace is a park diagonally across from my street that allows for a better view of the south eastern sky. With this limited time window, it is imperative for me to get the polar alignment, focus and plate solving done quickly so that I can focus on capturing images. After letting the automated focus routine complete succesfully, I was pretty stoked to get these many galaxies in the FOV of my CCD. I started capturing 300 second images. When I looked at the captured subs, they looked fine. I mean the focus was not perfect (the stars were a bit bloated) but I thought it was possibly due to exposure time. After, what I thought was a succesful couple of hours of data gathering, I called it a night and tried to stack the images to see how they look prior to getting some darks. Stacking the images threw a warning that only 1 image would be stacked. Quick google search revealed that this usually happens when the image is not in focus 😐 . It was too late to redo focus and capture the images that night. So i called it quits and planned to set up the following night as well.

The following night I decided that I am not going to take any chances with focus. So after polar alignment, I slewed to a brightish star and placed a Bahtinov mask for focus. If I did not already mention, once I set up my gear, I sit at home and work on my computer for imaging while watching the live feed of my driveway from security cameras. So, using Bahtinov mask meant I either sit outside while focusing or do a couple of in and out trips. In anycase, I prefer automated focus to avoid either options!

Perfect focus using Bahtinov mask 🙂

After succesfully getting the camera in focus using the mask, I did plate solve and tried a different target – NGC 4645 Needle Galaxy. It was a fruitful night as I was able to capture this image. It has a bunch of pollution artifacts and I need to get a lot more exposures to get better Signal to Noise ratio but I am pleased with the results

NGC 4645 2 Hour total exposure time

With every failed/bust night, I learn something that I can put to use for the subsequent sessions making my process more and more efficient. However, I still need to do a bit of research on how to get pinpoint focus with the EKOS focus module algorithms rather than using Bahtinov mask. This will especially be useful if I set up a remote observatory at some point in the future. Hopefully, by next clear night, I will be able to figure the autofous routine and not need to use the Bahtinov mask!

Astronomy: The night was a bust, well almost!

After two months, there was a clear night in the Pacific NorthWest. Naturally, I decided to set up my telescope and get some pictures. I wanted to capture some real data to process and publish so did not tinker with my setup. Since it is galaxy season right now and between the mirrorless and CCD camera, the CCD set up was tried and tested, so I decided to use it. After putting my son to sleep, at around 8pm, I set up my camera, polar aligned it and got the imaging camera in focus. Problem started when I was looking to get my guide camera in focus. The camera wasn’t taking a picture and returning this error: [ERROR] GetQHYCCDSingleFrame error (-1)

I tried rebooting my Raspberry Pi and switching the USB ports but still the same error. I had recalled that earlier i had to download the latest SDK to make my QHY camera work. I tried that as well but with no luck. At that point I decided that instead of trying to debug the issue, I would rather capture some data. Without autoguiding, I couldn’t expect to get pinpoint stars with more than 30 second exposure but that would mean I wouldn’t get any sort of details of the galaxy arms. Even so, I just wanted to be able to capture some deep sky object. The target was M51 (Whirlpool Galaxy) and plate solving (which I had a bit of trouble getting remote solver to get going) placed smack in the middle of my frame. I started shooting 30 second subs and luckily there was no trailing. I could have bumped up the sub duration but I did not want to try it then. I took around 60 subs plate solving every 10 or so subs to make sure the object was in the center of my frame. I could have continued taking more pictures but I prefer at least 3 minute subs so checked the weather for the following night – “mostly clear” and decided that I will debug the problem during the day and set up the following night and hopefully get some useful data. I took around 10 darks and called it a night around midnight. I’m still figuring out the issue with the QHY camera and will write about it in a subsequent post but for now, here is what I captured:

M51 Whirlpool Galaxy. 60 30 second subs 10 30 second darks and no auto guiding.

This is a stack of 60 30 second subs and 10 30 second darks with just some stretching and no post processing. I still have a long way to go for getting a great print worthy astrophotograph but I think the night was not a total bust. One thing astrophotography will teach you is to be patient :). I have been at it for more than a year now but don’t think I have one photography that I can call great. I have, however, learnt a whole lot in this past one year and hoping that my efforts at documenting my journey will be helpful to folks who are just taking this hobby up.

[Edit]: Here is a post processed version of the image. After the initial stretching, I tried to get rid of some light pollution. I still have a long way to go in terms of learning how to post process but for such a short integration time, I don’t think the image is half as bad. What do you think?