I have had a telescope since 2012. Over the years, I invested in a CCD camera and a guide scope. However, none of them are currently in use for my primary astrophotography set up. As discussed in one of my posts, I recently splurged on a decent astrophotography set up that I am highlighting below. I will also get into the details of other gear I have and how I plan to use that in addition to my current set up.
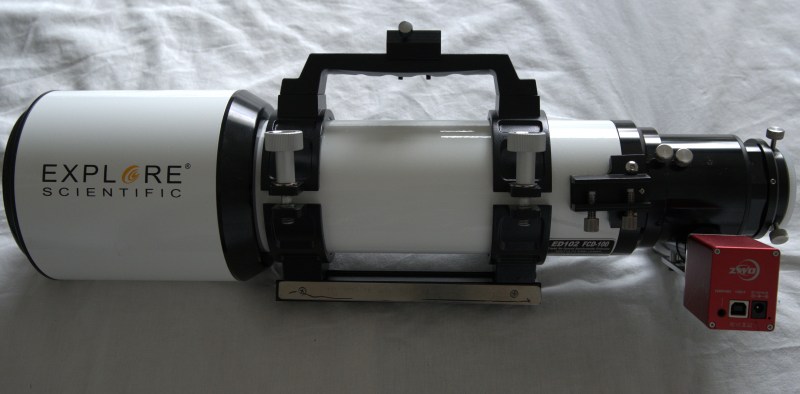
- The scope: The scope is a 102mm f7 Explore Scientific Refractor ED102-FCD100. This is a triplet refractor which is supposed to be very good at eliminating chromatic abberations – an artifact of refractor telescopes. It also has what they called extra low dispersion glass and EMD enhanced multi-layer coating. I am not sure what all of that mean or what they do to improve the quality of the image 🙂
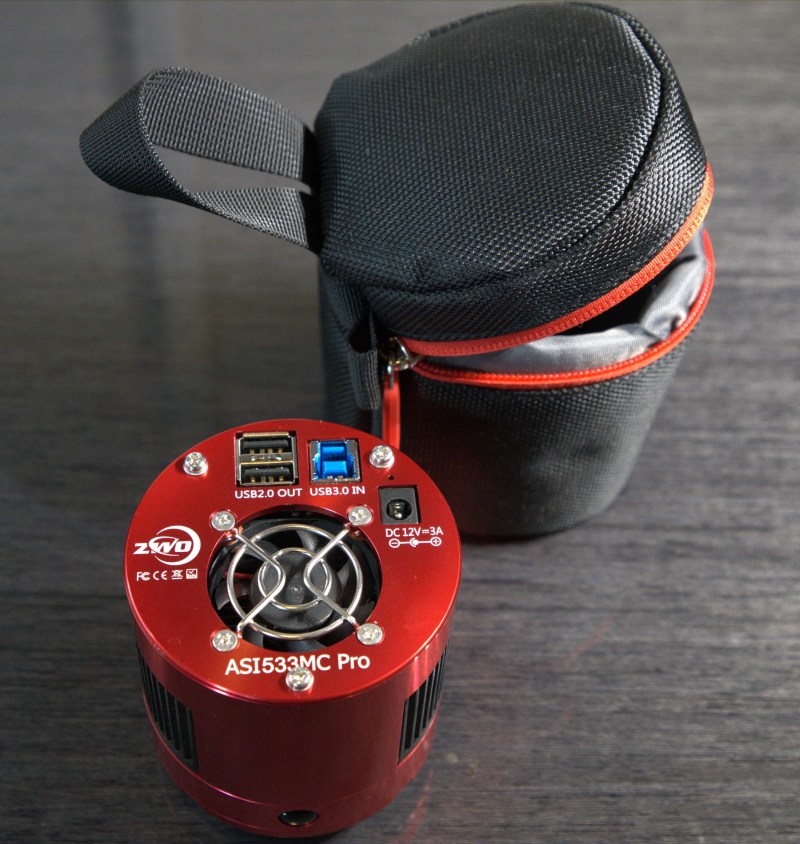
2. The camera: The CCD I use for taking pictures is a ZWO ASI 533MC Pro one shot color. The camera has a 11.31mm by 11.31mm 9 Mega Pixel sensor (1 inch diagonal) with 3.76 micron pixel size. While I like this camera so far, its sensor size and my telescope focal length results in a FOV that doesn’t allow me to capture wide planetary nebulae. I am exploring options with a full frame mirrorless camera but that is a journey in itself that I will discuss in a different post.
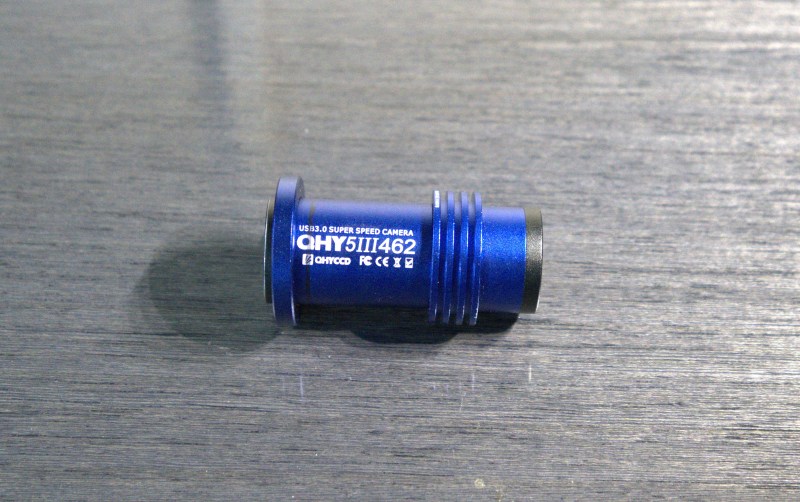
3. Guide Camera: For my guide camera I use a QHY 5III 462c planetary camera that I bought to capture Mars Opposition in Oct 2020. I need to test this camera for planetary photos with my 8 inch Newtonian but so far it has worked well as a guidescope.
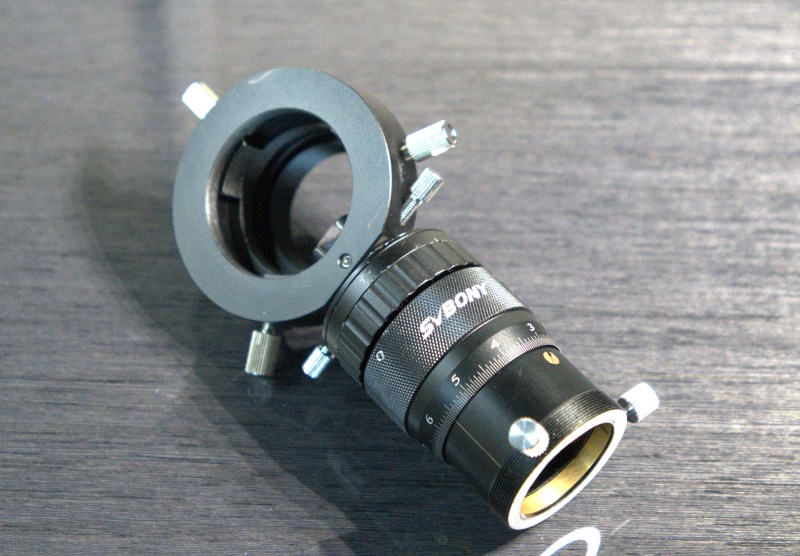
4. Guide scope: For my guide scope, I use my main telescope with a ZWO Off-Axis Guider. An addition I made to the camera is adding a SVBONY 1.25 inch double helical focuser to be able to bring the guide camera into focus for autoguiding.
5. Auto Focuser: While technically this is not a requirement for astrophotography, I purchased a ZWO ASI Electronic Auto Focuser (featured with the refractor image above). While I am still learning how to get the best focus, it has been very helpful to get pin point stars. There is still a bit of a challenge working with auto focus software but I will discuss that in another post.
6. Telescope Mount: The mount I use is a Orion Skyview Pro Equatorial Mount that I purchased in 2012 and subsequently upgraded to GoTo using Orion’s upgrade kit in 2013. I have done away with the SyncScan hand-controller and directly connect the mount to my computer for controlling the GoTo function. You can get the details on how I set up for Astrophotography here.
7. QHY Pole Master: I would remiss If I did not mention the Pole Master polar alignment camera. This has been a very useful tool for me to get set up relatively quickly. Prior to this, I would struggle with polar alignment. I purchased this few years ago and it has been a life saver on cold dark nights 🙂 . I think there are software now which use your main scope camera to do polar alignment but I have been using this for a while and it takes me less than 10 minutes to get polar aligned. I have shared a post about the accuracy of polar alignment using this camera here.
So, the setup above is what I use for Astrophotography from my front yard. This set up allows me to start my photography session in less than half hour. You can get further details of how I actually set up for astrophotography here.
