Astronomy: When cheap LPF solutions aren’t enough

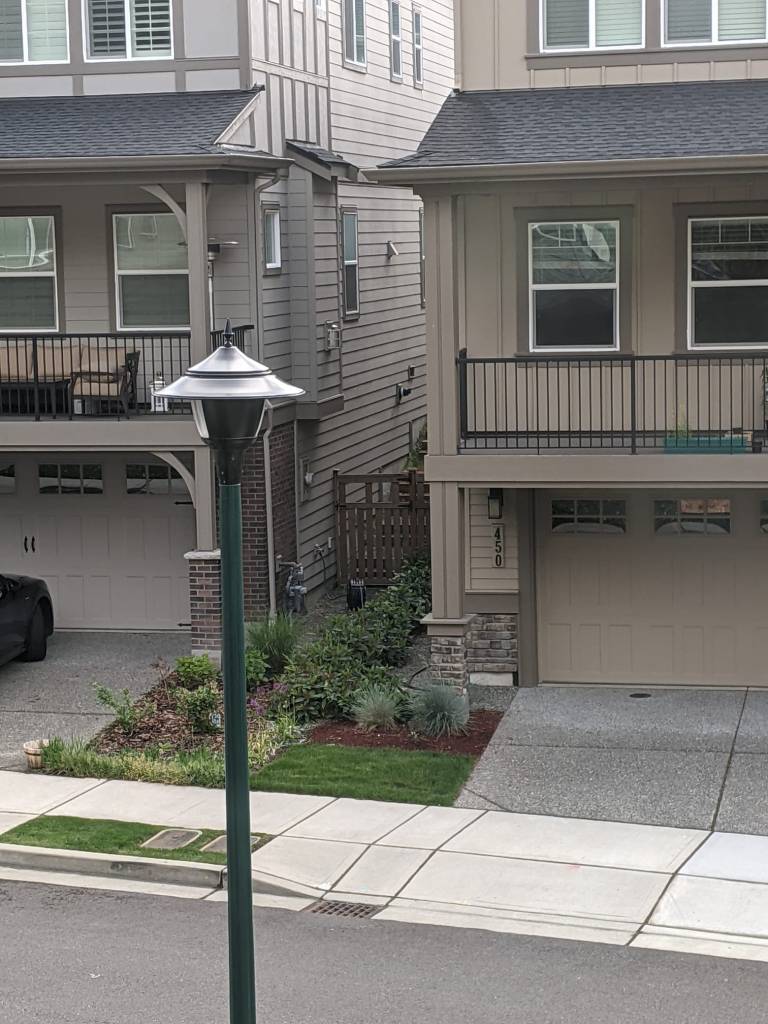
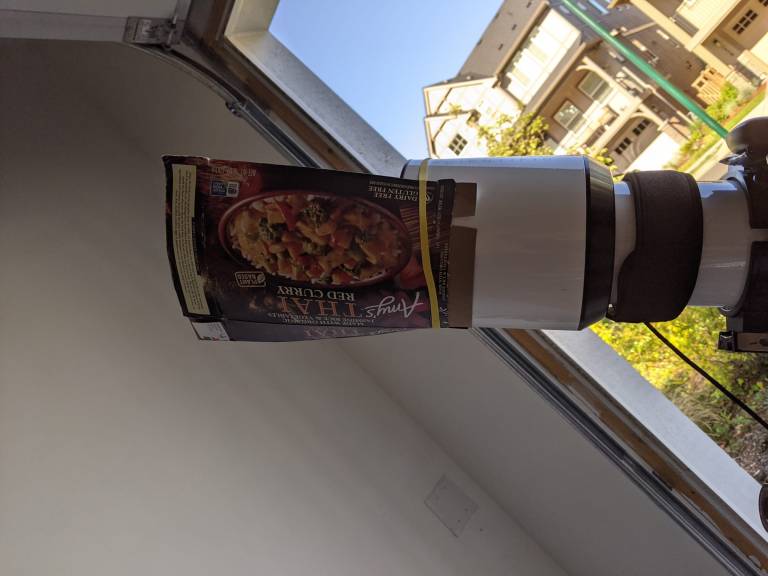
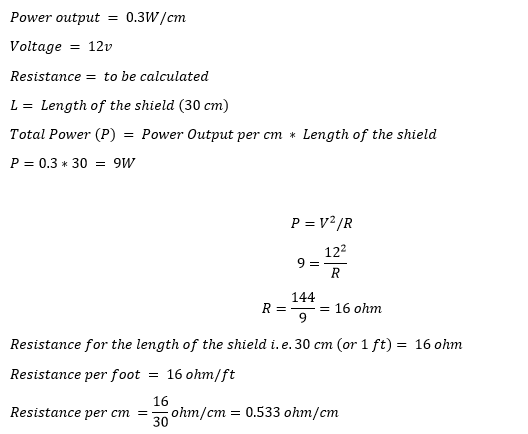
For a little over a year I have been doing astrophotography from my drive way, I have talked about how there is a lamp post right in front of my house creating challenges in photographing North Eastern Sky. I have, over time, employed crude techniques to limit the light intrusion from that lamp post including a crude cardboard placed on the OTA. Last night I was trying to image the fishhead nebula (IC 1795). It is visible on the north eastern part of the sky and I have been avoiding objects on that side because of the aformentioned reason. However, last night I had a plan! Well, what I thought was a fool proof plan. To block out the light pollution from the lamp post, here is what I did:

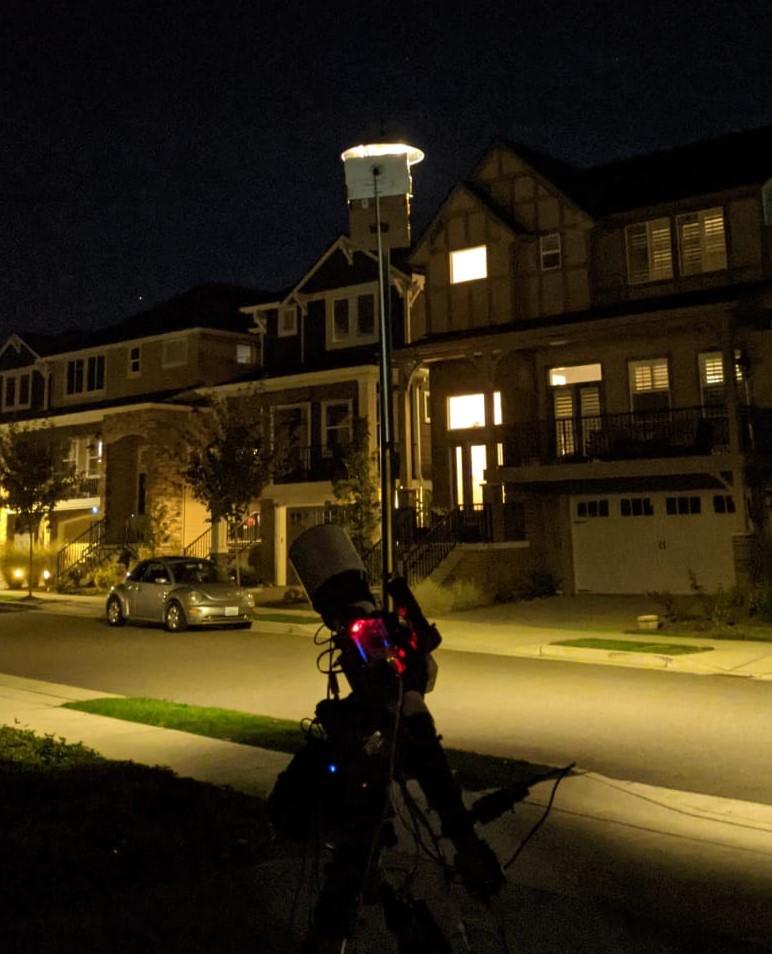
A relatively inexpensive solution that actually did a pretty goood job blocking the light from the lamp post. It’s a bit short and doesn’t cover the entire lamp but that I can fix for next time around. It has now become a part of my setup! However, the night was still mostly a bust for two reasons:

  1. Full Moon
  2. Autoguiding

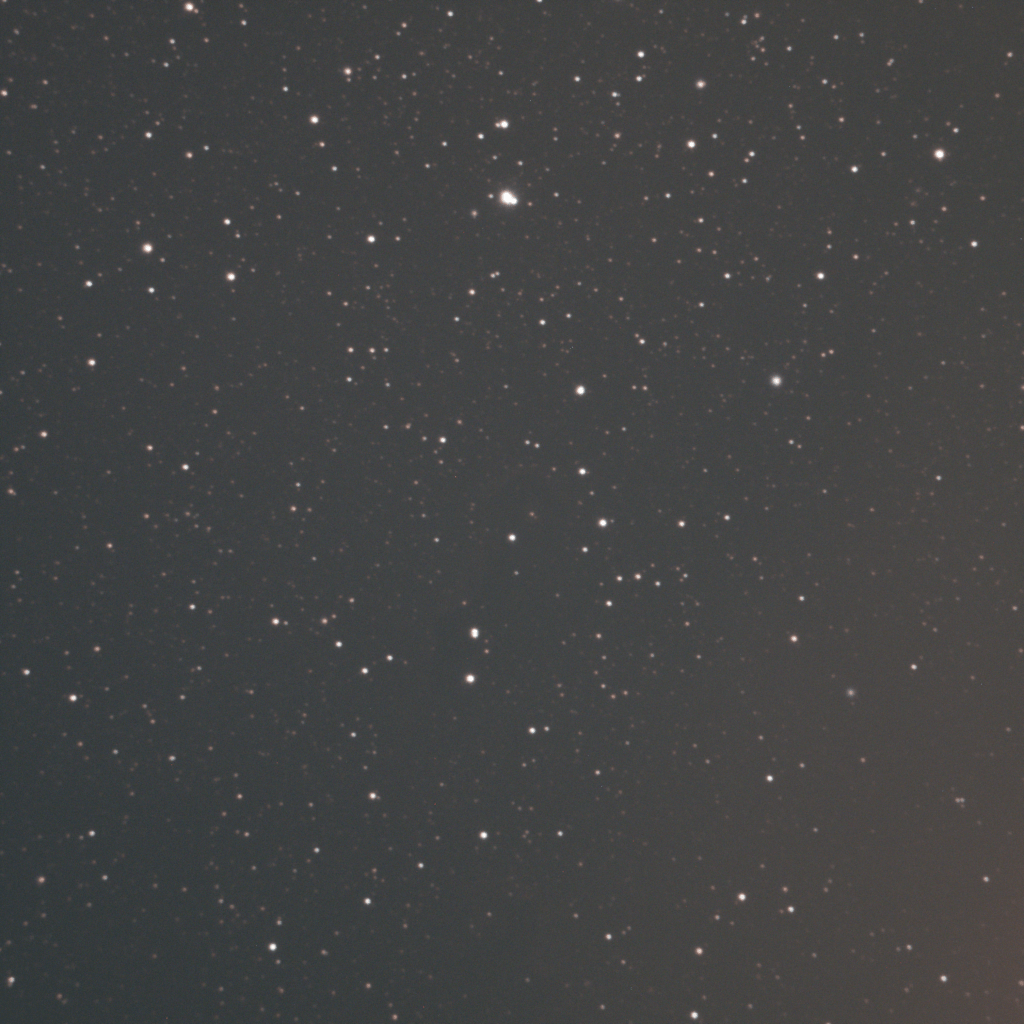
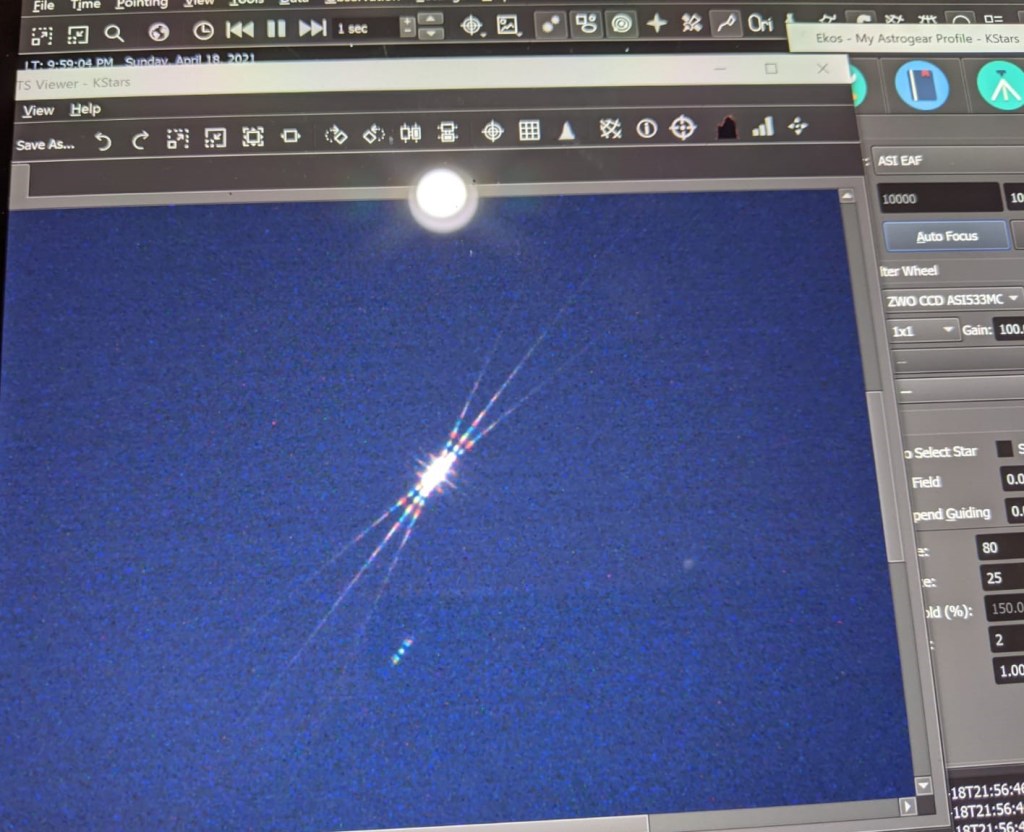
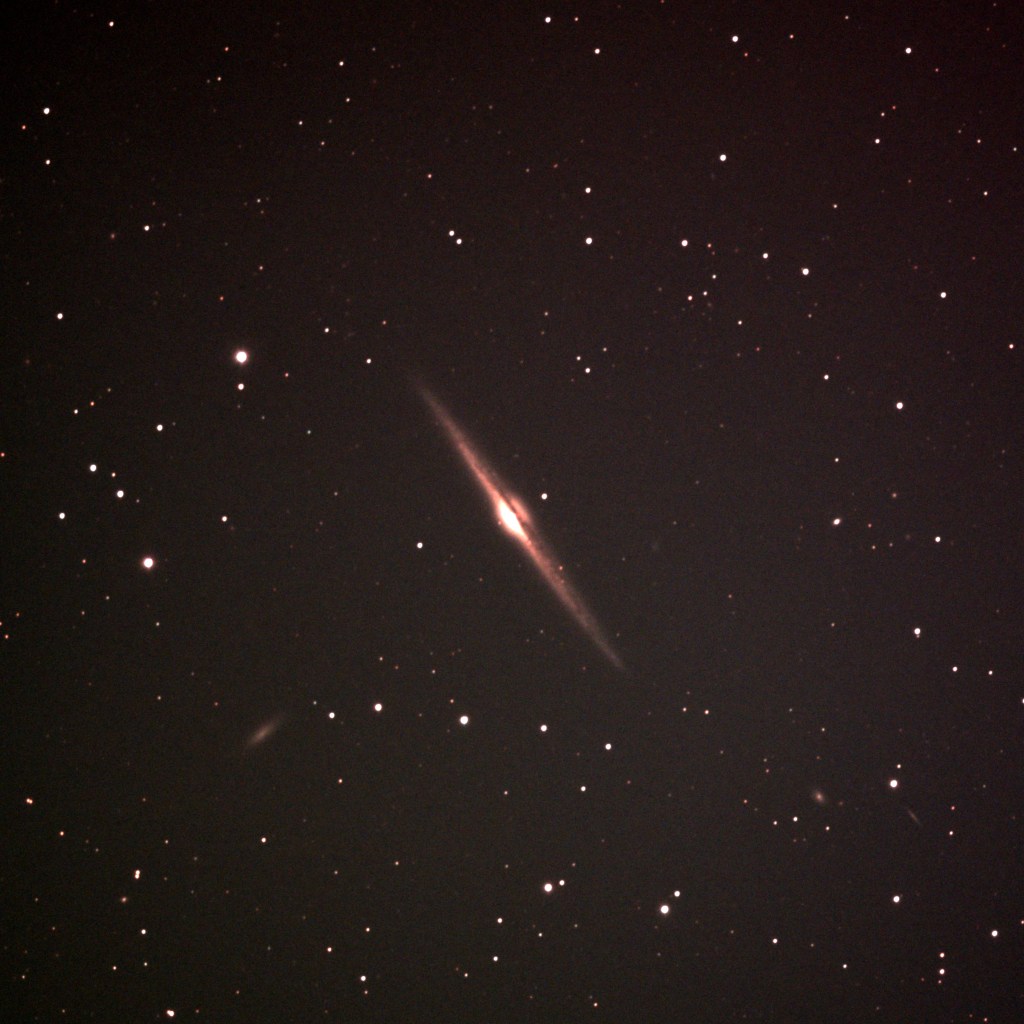
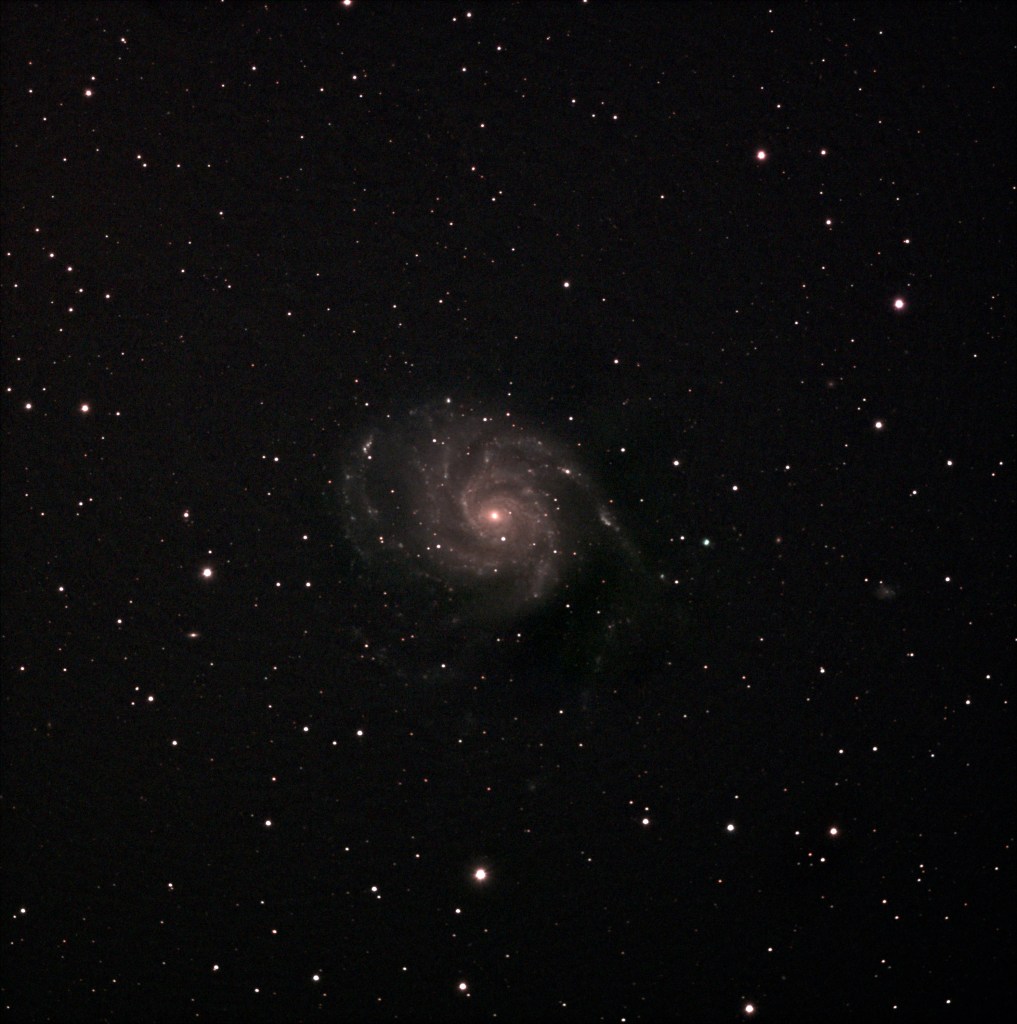
I had accounted for the fact that it was a full moon night and hence deliberately chose a target (away from moon) but the second issue forced me to choose another target. Given that the nebula is faint, I wanted to capture as much data as possible which meant atleast 180 sec, if not 300 sec light frames. Unfortunately, autoguiding was failing due to mount backlash issues. From my prior googling, I know that the mount needs to be balanced and not over capacity. I ensured that th mount was balanced before I started. I need to try next time with one less counter weight placed at the end to see if two counter weights are taking mount over capacity. Anyway, because of spectacular failure in autoguiding, I had to resort to unguided images which meant easier targets. I slewed to triangulum galaxy as I thought it would be okay to get 100 sec or less unguided exposures. While I did achieve good round stars and no star trailing (surprised as autoguiding was failing but this worked 😐 ), there was a glow from the moon that washed up the images. I could not go longer exposures for the fear of getting even more glow from the moon. Unfortunately, that meant no salvagable data from the night and a key learning – there is more astrophotography related spending in my near future 🙂 .

I need to decide what the next steps are. First, I think i need to try out another night to see if guiding issues still persist. If so, it might be time to retire the mount. It’s been with me since 2012 and has fallen from my hand more than once. More on my thoughts on that later. Second, I need to decide between continuing with OSC (one shot color) photography from my driveway, knowing that the lamp post light pollution is potentially solved but moonlight is not, or go with RGB with a monochrome camera. The advantage of OSC is that I get the entire color spectrum data at once. Given that I have limited window each night to work with, I can try to wrap up a target in a couple of nights. However, OSC also means I am limited to nights when the moon isn’t a problem or I have to invest in a LP filter or a nebula boost filter that can block moon light as well. Its a couple hundered bucks and I’m set. I do need to research what filter to buy though 🙂 . Monochrome photography means a whole lot of expenses – Monochrome camera, filterwheel, filters. While it might clearly seem that the scale is tipped towards OSC from cost perspective, monochrome *may* be the way to go if I consider long term where I will invest for my potential (hopefully) future observatory. So … A lot of contemplation, deliberation and reflection lies ahead. Will come back and share my decision and the rationale in the next post. Stay tuned!

Astronomy: Light Pollution, Crude fix to save the night

I’m not sure if I have shared this before but I currently take pictures from my drive way. Apart from the limited FOV, only the south eastern, north eastern are visible making it a bit challenging to get images for objects more than a couple of hours a night. On top of that, there is a bright street light right next to my drive way 😐 . The light also shines right into one of the guest bedroom. To mitigate the problem, I contacted the light company and explained the situation. The were kind enough to put up a shield on one side of the light. While helpful, it is not completely opaque allowing enough light to pass through so as to be a problem.

Light pollution source on my driveway

This is usually not a huge challenge when I take pictures of objects in the south eastern skies. However, at this time of the year not many targets are visible in that region of the sky during the early part of the night. So I had to resort to targeting objects in the north/northeastern skies. The lamp created so terrible LP artifacts that the subs were unusable. I had a cheap light pollution filter applied but it wasn’t any use either. Here are a couple of sample pictures I tried to take. The first one is a 5 minute sub of Elephant’s trunk nebula (not sure if you can make out the faint outline at the center of the image) and the second is 3 minute sub of Iris Nebula. As you can see, both the images have the light pollution artifact ruining the right side of the image. The more subs I stack the more apparent the problem becomes. Going back to my point about PNW not getting enough clear sky nights, I did not want the night to be ruined. Especially, as I was able to achieve pretty good focus and guiding.

Elephant Trunk Nebula 300 second Image
Iris Nebula 180 second image

So, I resorted to a very crude but effective way to get rid of light pollution (within limits) as long as the object was not in close proximity of the street light. My solution was to quickly put up a flattened cardboard box at the end of the OTA using an elastic band. Here is what the set up looked like 🙂

Amy’s Thai Red Curry to the rescue!

The crude and quick fix saved the night. I don’t care how it looks! It worked!! You can see the results for yourself to judge. However, I think I need to improve on my light pollution filter and create a v2 that is a bit more “sophisticated” 🙂 (black chart paper which encircles the entire OTA). Will keep you posted on how that goes

Iris Nebula Light Pollution mitigated

Astronomy: Can’t get to focus

I’m not talking about me here. Although, the title of the post can apply to my work life and personal life in light of covid-fatigue, this post is about focus on my telescope. My setup is mostly automated once the telescope is placed in position and polar aligned. I know, in one of my posts I mentioned vlogging about my setup for any new astronomers out there. I just have been too lazy to do it #COVIDfatigue. I’ll get to it at some point but not sure if it is worth anything for the 2 subscribers that I have 🙂 . So, where was I, oh yes, focus on my telescope. My setup is mostly automated and I used EKOS and Kstars for imaging. The software also has focusing algorithms if you have a motorised focuser. I have so far struggled with getting pinpoint star focus using the algorithms. In fact, I have wasted a couple of wonderful nights because the pictures were not quite in focus and the stacking software did not reconize the stars. Here is an example image from last night which was a lost cause. I was trying to capture a portion of the Markarian’s chain – a popular target for the galaxy season.

Failed attempt at a part of Markarian’s Chain – Each fuzzy object is a galaxy!

One of the challenges imaging from my driveway, is the limited time window objects are visible for. The field of view is limited with my house obstructing all of western part of the sky and the houses across from my house cover a substantial portion of the sky on the eastern side. The only saving grace is a park diagonally across from my street that allows for a better view of the south eastern sky. With this limited time window, it is imperative for me to get the polar alignment, focus and plate solving done quickly so that I can focus on capturing images. After letting the automated focus routine complete succesfully, I was pretty stoked to get these many galaxies in the FOV of my CCD. I started capturing 300 second images. When I looked at the captured subs, they looked fine. I mean the focus was not perfect (the stars were a bit bloated) but I thought it was possibly due to exposure time. After, what I thought was a succesful couple of hours of data gathering, I called it a night and tried to stack the images to see how they look prior to getting some darks. Stacking the images threw a warning that only 1 image would be stacked. Quick google search revealed that this usually happens when the image is not in focus 😐 . It was too late to redo focus and capture the images that night. So i called it quits and planned to set up the following night as well.

The following night I decided that I am not going to take any chances with focus. So after polar alignment, I slewed to a brightish star and placed a Bahtinov mask for focus. If I did not already mention, once I set up my gear, I sit at home and work on my computer for imaging while watching the live feed of my driveway from security cameras. So, using Bahtinov mask meant I either sit outside while focusing or do a couple of in and out trips. In anycase, I prefer automated focus to avoid either options!

Perfect focus using Bahtinov mask 🙂

After succesfully getting the camera in focus using the mask, I did plate solve and tried a different target – NGC 4645 Needle Galaxy. It was a fruitful night as I was able to capture this image. It has a bunch of pollution artifacts and I need to get a lot more exposures to get better Signal to Noise ratio but I am pleased with the results

NGC 4645 2 Hour total exposure time

With every failed/bust night, I learn something that I can put to use for the subsequent sessions making my process more and more efficient. However, I still need to do a bit of research on how to get pinpoint focus with the EKOS focus module algorithms rather than using Bahtinov mask. This will especially be useful if I set up a remote observatory at some point in the future. Hopefully, by next clear night, I will be able to figure the autofous routine and not need to use the Bahtinov mask!

Astronomy: DIY Dew Heater

Whether you are a visual astronomer or astro-photographer, one challenge that every one of us faces is dew. Without proper dew management techniques, we run the risk of ruining a perfectly clear night. As you know by now, I live in the Pacific NorthWest and I would hate to lose a perfect night especially when we get so few clear nights to begin with. Right now, its been almost 2 months that I had an opportunity to take my telescope out so dew should not be a reason to pack-up the night. Luckily, there are several dew heaters available in the market to choose from. However, they range anywhere from $50 to $200 with controller costing another $100-$150 bucks. Since Astronomy is an already expensive hobby, I thought I’d use some of my shoddy DIY skills to build a dew heater for myself and document the process along the way. In all, the whole set up doesn’t cost more than $25-$30 but it gets you enough raw material to make several dew heaters of various sizes to fit your equipment including telescopes, guide scopes, eye pieces and camera lenses. The most important thing for building a dew heater is the power output. From looking up online, I found that 0.3 W/cm is considered good output for a dew heater and based on my field test, that’s works. The video below documents my process for building a dew heater. This is my first attempt at vlogging so please bear with me for any noob mistakes and for the pace of my narrative. It is unscripted 🙂

Here is a list of all the items (along with the links to the ones I used) needed to build your own dew heater:

  1. Heating Element (Nichrome Wire)
  2. Heat Shrink Wrap
  3. Dimmer Switch
  4. Wire
  5. 2.5mm jack
  6. Power adapter
  7. RCA Jack
  8. Velcro (optional)

These are the items that go into the dew heater itself. There are other tools (for example: a soldering gun) required to complete the project which are are apparent in the video so I will not be listing them here.

As for the calculation on what gauge Nichrome wire to get for the length of the dew heater. Here it is:

I searched the internet for the wire whose resistivity matches closes to what I needed (16 ohm/ft) and found that 34G fits the bill. Hope this helps!

I was hoping to have a fancy calculator where you input the details and it spits out the resistance that you need but that is not available in the premium subscription I have for my website :).

Astronomy: Guiding Issues Resolved

The guide camera issue that I encountered couple of nights ago is now officially resolved. If you haven’t read my previous blog on the issue. Here it is. I was receiving error [ERROR] GetQHYCCDSingleFrame error (-1) and wasn’t able to find a solution online. To resolve it, I decided to re-install Astroberry software and test the camera again. My thought was that in the process of installing sdk for the camera, I might have messed something up. So, I went through the process of reinstalling the software, which in of itself is not a big deal. It takes all of 10 minutes. The bigger pain is installing astrometry image files for plate solving. They FOV that I usually download the files for (its much more than I need) takes up about 13GB of space taking a bit of time to copy over. Once I re-installed EKOS and INDI, I tested the camera and viola, it worked. Just to make sure that running my CCD and guide camera together were not causing issues, I connected the CCD camera as well. Everything worked fine! Excited, I decided to shoot M101 (Pinwheel Galaxy) for the night.

After putting my son to sleep, I set up the scope in the drive way, connected the mount, the guide scope, the focuser and CCD to RPI4, polar aligned it and was all set. I turned on everything and took sample images from CCD to see how far off focus I was and then took a test image from my guide scope and what do I see: [ERROR] GetQHYCCDSingleFrame error (-1). I thought that this night was either going to be a bust or I will have to take short exposures I did last time. Before deciding to go for short exposures, I decided to debug the issue for a bit since the camera worked in the afternoon. The only difference was that I had connected all the equipment now but had only the cameras connected in the afternoon. I disconnected the mount and tired a short exposure image from the guide camera and it worked! Realizing that it must have something to do with my USB hub, I decided to connect the guide camera directly to the RPI4 instead through the HUB and it solved all my problems!

I was able to just over 3 hours of data, most for an image that I have taken so far, and the result speaks for itself:

M101 Pinwheel Galaxy 30×300 second and 11*200 second subs

There was some post processing that I had to do in GIMP to remove light pollution gradient and I think having more integration time would remove the noisiness/graininess from the image but overall I am pleased with what I was able to capture. I did include darks but not flat or bias frames. Next clear sky night I have to decide if I want to stick to this set up or test out my mirrorless with NINA. If I stick with this set up, should I get more data for the same target or go to a different one. Decisions, decisions too many decisions to make…… well, good thing is I don’t need to make any of the decisions right now 🙂 .. so let’s wait for the next clear night and punt the decisions to then.

[Edit]: One thing I forgot to mention in this post and prior post covering this issue is that the setup had worked with all my devices connected to the USB hub. Something changed between builds of Kstars/EKOS/INDI that caused the driver to break.