
I had been meaning to post this for ever. I had, what I thought pretty good arrangement for cable management with my SkyViewPro mount and the ES 102mm. There were only 2 wires going from the mount/telescope down to the battery pack/power supply (technically power supply and router as I was connecting a lan wire to my rasbperry pi). However, with my mount kinda dying and me investing (hehe 🙂 ) in a new one, this setup is not very useful for me anymore. I still thought I should post this for anyone interested in a DIY solution to make cable management easier. I did two iterations of my set up, the second one being much more compact than the first one. Either works. It’s all up to one’s apetite for DIY. I was hoping to do a YouTube video on this as well but never got around to it and now I have dismantled this set up owing to my new mount purchase (details in a later post). This solution may be an overkill for someone who is willing to shell out a few hundered bucks for s device such as ZWO ASI air or ASI Air pro but I like to tinker with things so I built myself a cheap solution. Like I said, I don’t have a video on it so for now pictures and a narrative is all I have. However, I promised a friend of mine that I will build him a similar solution so I’ll plan to record that session and upload it to the interweb.
There are three main components to making cable management easier. All these components need to be placed on the telescope so the smaller the footprint the better it is. My telescope is not that heavy so mounting three different not so compact items did not add too much weight. I used velcro to make sure they stayed on the scope. Anyway, I digress. The components are:
- A computer to control the cameras, mount, guidescope, filterwheel, focuser etc. In my case, I used Raspberry pi running astroberry software
- A USB hub to run the various devices. Onboard USB ports on Rasbperry Pi are inadequate because of the limite current those devices can draw
- A power hub to supply appropriate power to the devices.
- 12v to 5v stepdown module
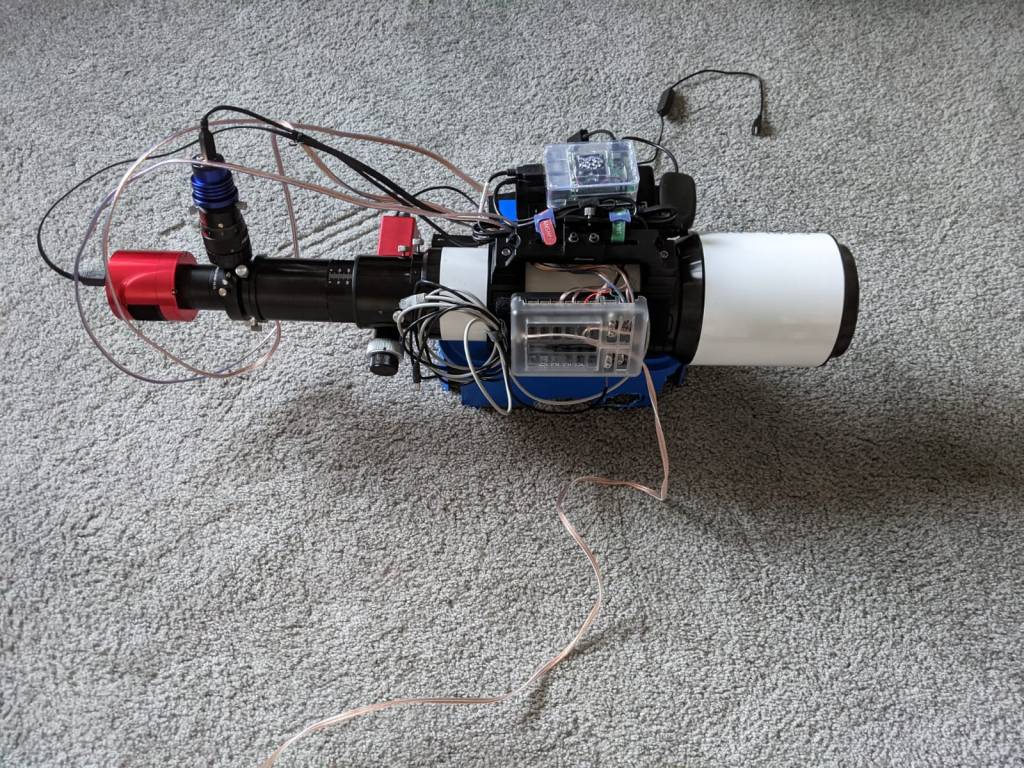
Well, its technically 4 components even though I said three main because the stepdown module doesn’t have a very large footprint :). This setup has served me very well and I would have continued using it with refinements over time, if not for a change in my mount that has pretty good features for cable management. The below image is a top view of all the connections. Not sure if you can tell but there is a rasbperry pi on the left and underneath which is a 7port USB3 hub. On the right is a power hub with 12 outs (a typical fuseblock used in automotives). In hindsight, 12 outs might have been an overkill 🙂 . I just needed 6 which ould have still left a couple open for future enhancements (filterwheel) and a couple of dew heaters. In anycase, with the 12 out fuseblock, the weight on the left was being compensated well on the right side so I let it be. While I would, in the future, need an output port for a dew heater, I currently use a cheapo USB one that I had purchased before I built my own DIY dew heater. When I purchased it, I was worried that it wont have enough power output but it works fine for the scope that I have. So I currently use it just for this scope. I dont need to add another output and the 7port USB hub powers it fine.

Here is a view with everything connected and you can see the USB and power for the mount folded near the focuser next to the fuse block. I haven’t used the handcontroller in over a year now. I just use the EQ mod cable with a connection directly from the rasberry pi to the mount. It works great!
The above set up with Astroberry software works just great except for the focus module. I never seem to have gotten it to work. Others have, so I just need to tinker with it a bit. However, as I think I mentioned in one of my earlier post, I always try to spend as much time imaging on clear nights as possible so have been using a Bahtinov mask. It’s probably time to figure out the focus module to get truly remote set up – from my driveway 🙂 .
I was in the process of upgrading the above to a very small footprint setup (think ASI air size 🙂 ) but then my mount died and I purchased a new one so that set up is kinda not useful anymore. I am thinking I will leverage that for my friend to use. Here is how the – in progress – setup looks like:
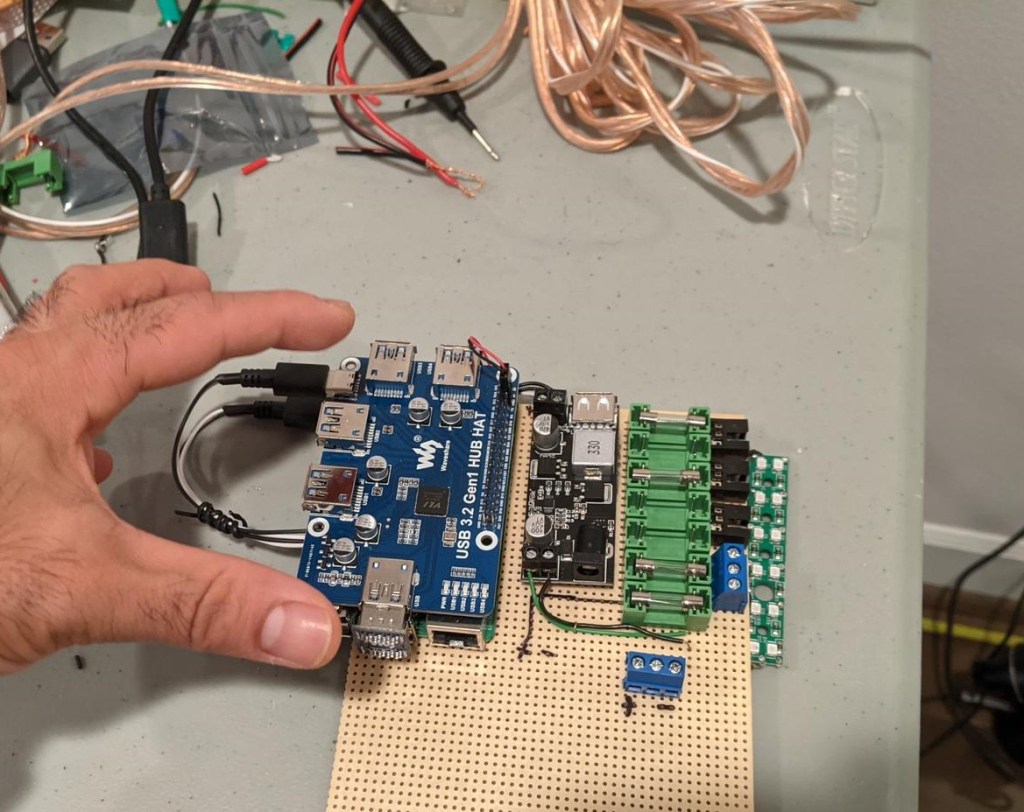
It has 7 power ports and can be enclosed in a small DIY project box once complete. Like I said, I will try to document the process over view and share when done. Till then … Take care!
